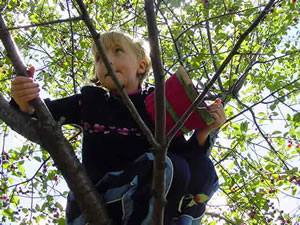
True, you could use canned cherries, BUT if you have access to a "pick-your-own" cherry orchard, you will have lots of fun getting them. Plus the pie will taste WAY BETTER at the end when fresh cherries are used. Please note here, you need the sour or tart cherries to make a pie. Sweet cherries are not generally for baking.
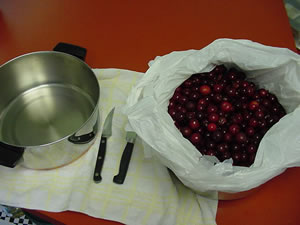
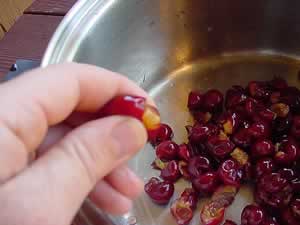
Okay now for the next best part, the pit removal. You will need an extra pan for the seeds. Some folks like to use a knife to get those pesky seeds out, but we prefer to SQUEEZE them out. It's a pit like popping a zit.
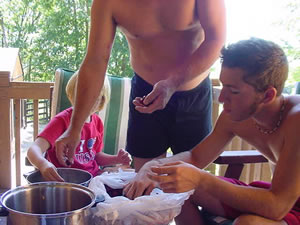
Gather your favorite people around, sit on the porch or deck or anyplace where sprayed cherry juice won't be a problem, and then spend some quality time talking, laughing, and SQUEEZING.
** Be careful not to get any seeds in the good bowl or you'll be eating them with the pie.
Step4
Here we see demonstrated the
proper Squeezing method. It really is fun. Some folks can do two at a
time!
Step5
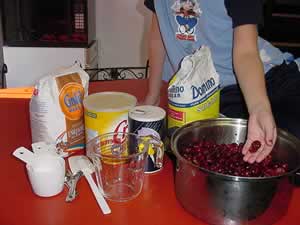
Now its time to gather your supplies:
- 1 cup (200g) sugar
- 1.5 tablespoons flour
- 1/4 teaspoon salt
- 4 cups (1L) fresh or canned sour cherries, seeds removed
- 2.5 tablespoons quick-cooking tapioca
- 2 teaspoons butter
- Ingredients to make two
9-inch crusts
2.5 cups (350 g) flour
1/2 teaspoon salt
3/4 cup (1.75 dL) butter flavored shortening
6-8 tablespoons of very cold water
Step6
Preheat your oven to 425 degree F (220 degrees C)
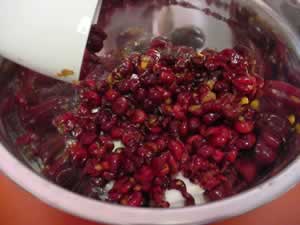
To get the cherry filling ready, mix the sugar, flour, and salt in a large bowl, add the cherries (if canned, drain them; use only 1/4 cup of sugar and add 1/2 cup of the juice to the sugar mixture), and toss until well coated.
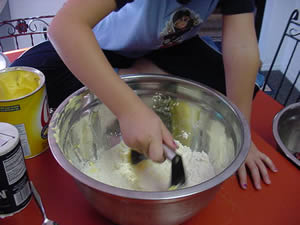
Now its time to get those pie crusts made. Cut in the shortening with a pastry blender or an egg whisker or even two knives.
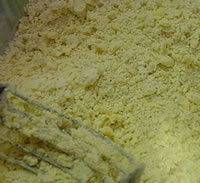
You want to combine it lightly until the mixture resembles coarse meal or very tiny peas: its texture will not be uniform but will contain crumbs and small bits and pieces.
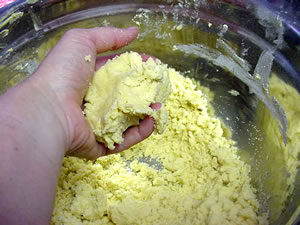
Now it's time to get down to business. Sprinkle very cold water over the flour mixture, a tablespoon at a time, and mix lightly with a fork. Use only enough water until you reach the point where it will form a ball when squeezed in your hand.
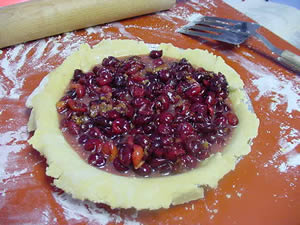
Separate that dough into two balls, roll the first one flat and place it in your pan. Be sure you roll a big enough circle to fill the bottom of the pan and still have some laying over the edges. Then pour in your cherry mixture.
Step11
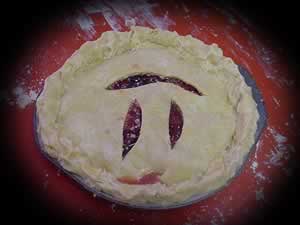
Roll the second ball out flat and lay it on top of the cherry mixture
then take the extra dough laying around the edges and squeeze it into
a decorative edge mound the entire way around the pie. Remember you need
to lock in all that juice that is going to cook up out of your cherries.
At this point you want to cut a design on the top crust. This allows juice to evaporate out a bit and basically keeps the pie from exploding. We at themathlab.com like the symbol pi. Somehow it seems appropriate here.
Step12
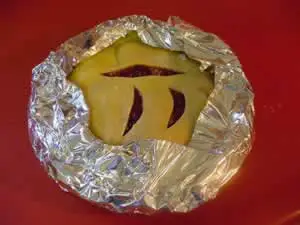
To prevent that all too disappointing
thing called burnt edges, we recommend wrapping about 3 inches of foil
around the outer perimeter before baking.
Bake at 425 degrees F (220 degrees C) for 10 minutes, then reduce the heat to 350 degrees F (180 degrees C) and bake 30-40 minutes more or until the crust is browned. Every oven is different so keep an eye on it and take it out when it looks golden browned and delicious.
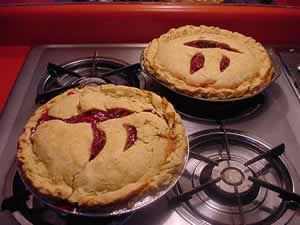
Ooh la la! Oh baby, baby! Your kitchen is gonna smell great. And your tastebuds are about to experience true ecstasy.
Step14
EVERYBODY
EAT!

This recipe came from
The
Fannie Farmer Cookbook. It is filled with tons of great eating and
will teach you a lot about cooking along with the recipes. It gets out
highest recommendation.
Home | About
Us | Algebra| Dictionary | Games | Geometry | Gym | Humor | Lab | Magic | Natural Math | PreAlgebra | Resources | Teachers Only | Toolbox | Treasures | Videos | Wonders | Writings |
Copyright © 1999-2020 themathlab.com