You can use a combination of wax and dye to create some excellent shirt designs.
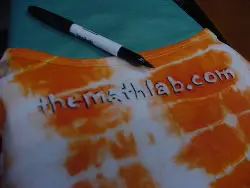
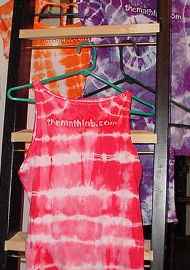
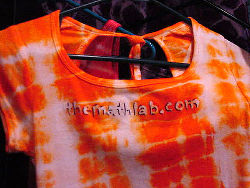
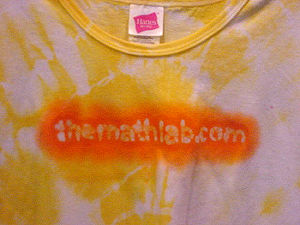
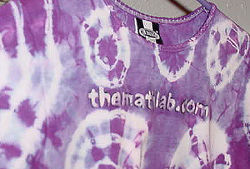
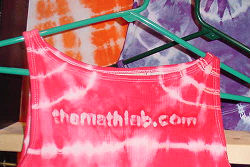
The method is called BATIK. It can be used to create logos or artwork that appear to "float" on the shirt. People will ask, "Hey how'd you do that?"
All you do is create a design or logo, place it under a white cotton shirt, and then paint over the design with liquid hot wax, then dip the shirt in dye, or paint dye over top of the wax. The wax will prevent any dye from penetrating the fibers of the shirt.
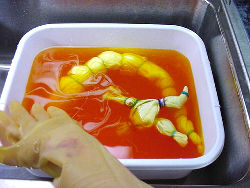
We used a tie-dye approach here, but any dye method that involves cold water will work.
After the shirt is rinsed of excess dye and allowed to air dry, you simply iron out the wax into several sheets of clean paper towels.
If you want to learn how, look below.
You can batik on most natural
fiber material, like cotton, silk, and linen. We usually use 100% cotton
T-shirts.
Try it on shirts, hats, dresses, socks, pillowcases, just about anything that you could iron the wax out of.
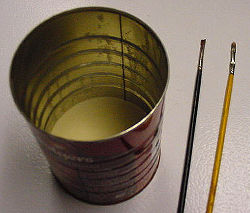
You'll need a coffee can, some old white candles or some paraffin wax, *dye, and one or two old paint brushes, an iron, several sheets of absorbant paper towel.
Note: the brushes will only be able to be used for wax afterwards.
*We use Dylon Cold dye. If you don't have a local arts and crafts store availlable, you can get the dye and other batik supplies, along with any other art supply imaginable, from the Sax Arts and Crafts catalog. Call 800-558-6696. This supply catalog will amaze you.
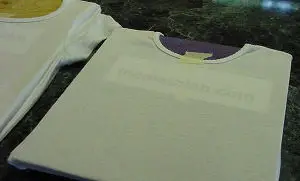
Place a piece of cardboard or plywood under the material, and tape your design to it.
Then tape the material securely.
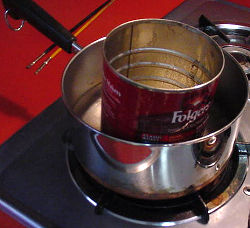
Place the wax or broken candle pieces in the coffee can, and place the can in a saucepan containing about 2 inches of water.
Heat on high until the wax melts completely, then lower the heat slightly.
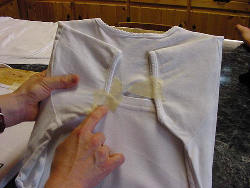
Dip the paintbrush in the liquid wax and paint over your design. Be sure that the wax penetrates the fibers completely.
Be careful not to drip any wax where you don't want it.
Once your design is completely covered with wax, you will need to crinkle the material. This will put fine cracks in the wax that will leave tiny bits of wax through and create the cool batik effect.
Then mix up your choice of dye, and dip material into the dye bath.
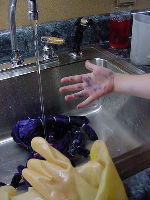
After the dyed material has been rinsed thoroughly, let it air dry.
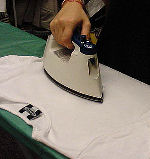
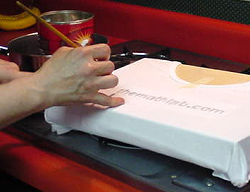
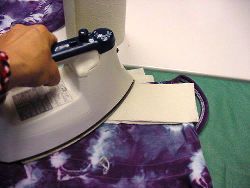
To get the wax out, fold clean paper towels and place them behind and on top of the wax. Then use a hot dry iron pressing firmly and moving across the waxed area slowly.
The heat will melt the wax out of the material, and the paper towels will absorb it.
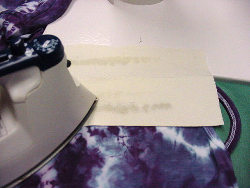
You will need to move the paper towel to a fresh area as it gets saturated.
Keep ironing until no more wax will absorb out.